🖥️ Lesson 1.3: The Unity Editor Interface
The Unity Editor can look overwhelming at first — panels, tabs, and buttons everywhere. In this lesson we slow right down and give you a guided tour of every part you'll use, so the whole screen starts to feel familiar.
🎯 Learning Objectives
By the end of this lesson, you will be able to:
- Name the six main areas of the Unity Editor and say what each one does
- Tell the difference between the Scene view (your workspace) and the Game view (what the player sees)
- Select an object in the Hierarchy and read its details in the Inspector
- Identify the Play, Pause, and Step buttons and know what they do
Estimated Time: 35 minutes
You'll need: Unity 6 installed and any project open (Lesson 1.2 covered installation). No coding yet — this lesson is all about finding your way around.
In This Lesson
Your Workshop
Think of the Unity Editor as a workshop. A carpenter's workshop has a workbench, a rack of tools, a shelf of materials, and a doorway to see the finished piece. Unity is the same — each panel is one of those stations. Once you know what each one is for, the clutter turns into a workspace.
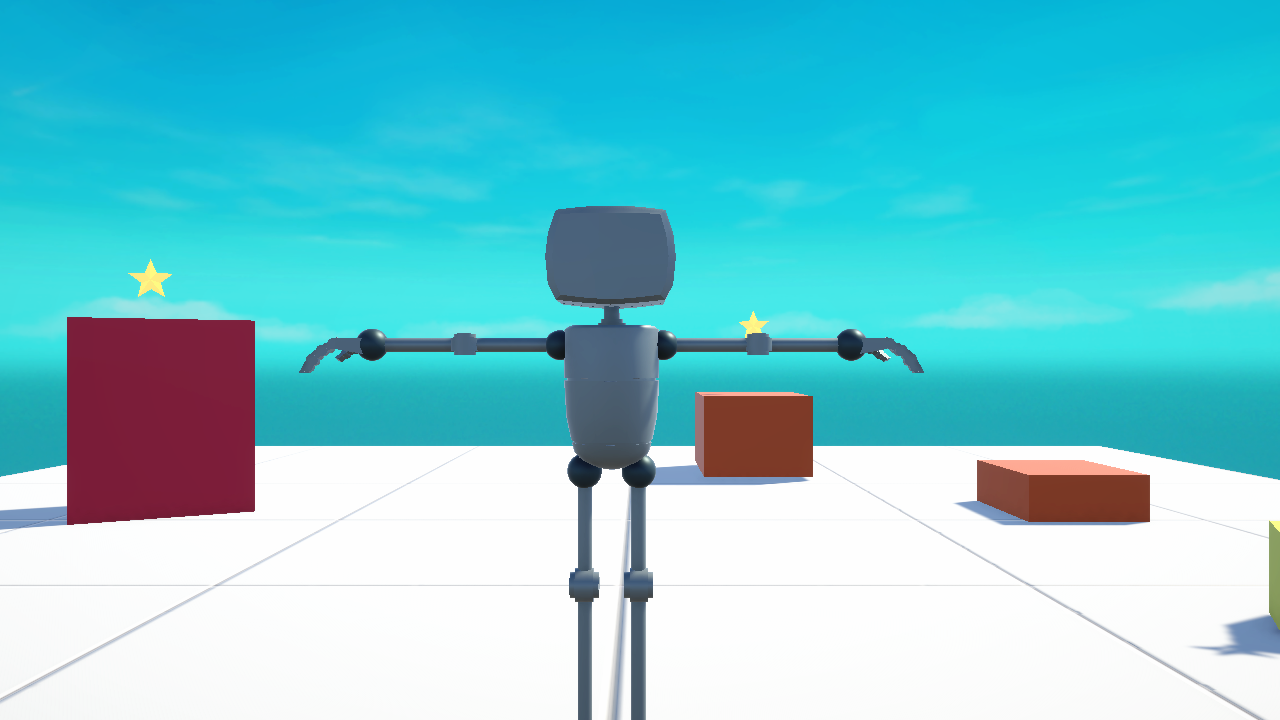
Everything you see in this lesson comes from a real Unity 6 project — a small "collect the stars" scene with a robot character. Here's the actual scene, rendered straight out of Unity:
💡 Don't try to memorize everything. You will not remember all of this at once, and you don't need to. The goal is recognition — so that when we say "open the Inspector," you know roughly where to look. It becomes second nature within a few lessons.
The Big Picture: Six Areas
No matter how it's arranged, a default Unity layout has six main areas. Here's how they're laid out, with each area numbered:
- 1Toolbar — the strip across the top. It holds the transform tools and the all-important Play / Pause / Step buttons that start and stop your game.
- 2Hierarchy — a list of every object currently in your scene. Think of it as the cast list.
- 3Scene & Game views — two tabs sharing one space. Scene is your 3D workbench; Game is exactly what the player will see.
- 4Inspector — shows all the details of whatever object you've selected, and lets you change them.
- 5Project — every file in your game: models, images, sounds, scripts. This is your materials shelf.
- 6Console — where Unity prints messages, warnings, and errors. Your early-warning system.
📖 Definition
Panel (or Window): one of the rectangular areas of the Editor, like the Hierarchy or Inspector. Panels can be dragged, resized, and docked. A saved arrangement of panels is called a Layout.
Scene View vs Game View
This is the single most common source of confusion for beginners, so let's make it crystal clear. They share the same space (two tabs, area ③), but they do very different jobs.
| Scene view | Game view |
|---|---|
| Your workbench. A free-floating 3D view you can fly around in. | The final result. Shows precisely what the player's camera sees. |
| You move, rotate, and place objects here. | You watch and test the game here — it comes alive when you press Play. |
| Shows helpers: grids, icons, outlines (called gizmos). | Clean — no helpers, just the game. |
Figure 1 at the top of this lesson is a real Game view render — it's what the player sees through the camera. In the Scene view you'd see the same robot and stars, but also grid lines, the camera's icon, and selection outlines to help you build.
⚠️ A classic beginner moment: "I pressed Play but nothing happens / I can't see my character!" Nine times out of ten, you're looking at the Scene tab instead of the Game tab, or your camera isn't pointed at the action. Check which tab is selected first.
Hierarchy & Inspector: A Team
The Hierarchy and the Inspector work together constantly. The rule is simple:
Click an object in the Hierarchy → its details appear in the Inspector.
The Hierarchy — everything in your scene
Here is the actual Hierarchy from our example scene. Notice that Ground is selected (highlighted), and some objects have a ▶ arrow — that means they contain child objects you can expand.
Ground is selected.The Inspector — the details of one object
With Ground selected, the Inspector shows what it's made of. Every object is a stack of components (we cover these properly in Module 2). For now, just notice that the Inspector lists them and shows their settings — like the exact position, rotation, and scale:
Ground. Its real values: a Cube mesh scaled to 30 × 10 × 30 with a white-grid material and a Box Collider — that's the floor you saw in Figure 1.✅ Pro Tip
The little coloured letters X Y Z are used everywhere in Unity for the three directions in 3D space. Red = left/right, Green = up/down, Blue = forward/back. Learning this colour code now will pay off in every later lesson.
The Toolbar & Play Controls
In the centre of the Toolbar are three buttons that control your game. These are the ones you'll press thousands of times:
- ▶ Play — starts your game inside the Editor. Press it again to stop. The whole Editor tints slightly to remind you you're in Play mode.
- ❚❚ Pause — freezes the running game so you can inspect it mid-action.
- ▶❘ Step — while paused, advances the game by a single frame. Great for studying fast events.
⚠️ Watch Out: the #1 beginner trap
Any changes you make to objects while in Play mode are thrown away the moment you press Stop. It's a safe sandbox to test in — but if you carefully position something during Play, it will snap back when you stop. Always exit Play mode before doing real work. (Unity's Play-mode tint is your reminder.)
Hands-on: Take the Tour
🏋️ Exercise 1: Find every panel
Objective: Build muscle memory for where things live. Open any Unity project (an empty one is fine) and locate each area.
Instructions:
- Find the Hierarchy on the left. How many objects are listed? (A brand-new scene usually has a
Main Cameraand aDirectional Light.) - Click the Scene tab, then the Game tab. Watch how the view changes from workbench to player's-eye.
- Click any object in the Hierarchy and watch the Inspector on the right fill up with its details.
- Find the Project panel at the bottom. Click a folder to see its contents.
- Find the Console tab next to Project. It may be empty — that's good, it means no errors.
- Locate the Play button at the top-centre. Don't press it yet — just find it.
💡 Hint: I can't find a panel!
Any panel can be reopened from the top menu: Window ▸ General, then choose Hierarchy, Inspector, Console, etc. If your layout looks messy, reset it with Window ▸ Layouts ▸ Default.
🏋️ Exercise 2: Selection detective
Objective: Confirm the Hierarchy → Inspector connection.
- Click the
Main Camerain the Hierarchy. - In the Inspector, find its Transform and read the three Position numbers (X, Y, Z).
- Now click the
Directional Light. Notice the Inspector completely changes to show its components instead.
✅ What you should have seen
The Inspector always shows one selected object at a time. Selecting a new object in the Hierarchy instantly swaps the Inspector's contents. The camera has a Camera component; the light has a Light component — different jobs, different components.
🎯 Quick Quiz
Question 1: Which panel shows a list of every object currently in your scene?
Question 2: You want to see exactly what the player will see. Which view do you look at?
Question 3: You made changes while the game was running (Play mode) and they vanished when you stopped. Why?
Tips & Best Practices
✅ Do's
- Reset your layout when lost. Window ▸ Layouts ▸ Default instantly restores the standard arrangement.
- Keep the Console visible. It's how Unity talks to you — catching errors early saves hours.
- Get used to the Scene/Game tabs. Glance at which one is active before you panic that "nothing works."
❌ Don'ts
- Don't do careful work in Play mode. Remember: it resets on Stop.
- Don't worry about memorizing components yet. We unpack them properly in Module 2.
- Don't fight the layout. You can drag panels around later; for now the default is perfect for learning.
💡 Pro Tips
- Hover over almost any field or button and Unity shows a tooltip explaining it.
- You can double-click an object in the Hierarchy to instantly frame it in the Scene view.
- Panels are tabs — drag a tab out to float it, or onto another to dock it. Handy on big monitors.
Summary
🎉 Key Takeaways
- The Editor has six main areas: Toolbar, Hierarchy, Scene/Game, Inspector, Project, Console.
- Scene view is your workbench; Game view is the player's view.
- Select in the Hierarchy → edit in the Inspector. Objects are made of components.
- Play runs the game; changes made during Play are discarded on Stop.
📚 Go Deeper (optional)
🚀 What's Next?
Now that you can find your way around, it's time to make something. In Lesson 1.4 you'll create a brand-new scene from scratch, add your first object, and save your work.
🎉 Nicely done!
The Editor used to look like a cockpit — now it's a workshop you recognize. That's a real milestone.